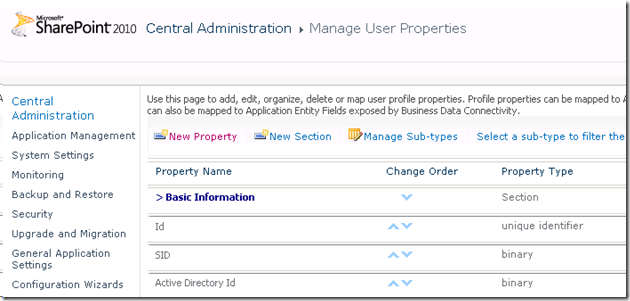
public class UserProfilePropertyManager {
#region Private Properties
private SPSite _site;
private SPServiceContext _serviceContext;
private SharePointUserProfiles.UserProfileManager _profileManager;
private ProfileSubtypePropertyManager _profileSubtypePropertyManager;
private UserProfileConfigManager _userProfileConfigManager;
private ProfilePropertyManager _profilePropertyManager;
private CorePropertyManager _corePropertyManager;
private ProfileTypePropertyManager _profileTypePropertyManager;
#endregion
#region Constructors
public UserProfilePropertyManager(SPSite site)
{
_site = site;
_serviceContext = SPServiceContext.GetContext(_site);
_userProfileConfigManager = new UserProfileConfigManager(_serviceContext);
_profilePropertyManager = _userProfileConfigManager.ProfilePropertyManager;
_profileManager = new SharePointUserProfiles.UserProfileManager(_serviceContext);
_profileSubtypePropertyManager = _profileManager.DefaultProfileSubtypeProperties;
_corePropertyManager = _profilePropertyManager.GetCoreProperties();
_profileTypePropertyManager = _profilePropertyManager.GetProfileTypeProperties(ProfileType.User);
}
#endregion
#region Display Order
private int GetLastDisplayOrderForSection(ProfileSubtypeProperty section)
{
int displayOrder = 0;
foreach (ProfileSubtypeProperty profileSubtypeProperty in _profileSubtypePropertyManager.PropertiesWithSection)
{
if ((section.DisplayOrder < displayOrder) && (profileSubtypeProperty.IsSection))
{
break;
}
displayOrder = profileSubtypeProperty.DisplayOrder;
}
return displayOrder;
}
private int GetLastDisplayOrderForSection(string sectionName)
{
var section = _profileSubtypePropertyManager.GetSectionByName(sectionName);
return GetLastDisplayOrderForSection(section.Name);
}
private int GetDisplayOrderForLastSection()
{
int displayOrder = 0;
foreach (ProfileSubtypeProperty profileSubtypeProperty in _profileSubtypePropertyManager.PropertiesWithSection)
{
if (profileSubtypeProperty.IsSection)
{
if (profileSubtypeProperty.DisplayOrder > displayOrder)
{
displayOrder = profileSubtypeProperty.DisplayOrder;
}
}
}
return displayOrder;
}
#endregion
#region Sections for Properties
private ProfileSubtypeProperty GetSectionForProperty(ProfileSubtypeProperty property)
{
ProfileSubtypeProperty section = null;
foreach (ProfileSubtypeProperty profileSubtypeProperty in _profileSubtypePropertyManager.PropertiesWithSection)
{
if (profileSubtypeProperty.IsSection)
{
section = profileSubtypeProperty;
}
if (profileSubtypeProperty.Name == property.Name)
{
break;
}
}
return section;
}
private ProfileSubtypeProperty GetSectionForProperty(string propertyName)
{
var property = _profileSubtypePropertyManager.GetPropertyByName(propertyName);
return GetSectionForProperty(property.Name);
}
internal ProfileSubtypeProperty CreateOrUpdateSection(string name, string displayName)
{
if ((_corePropertyManager.GetPropertyByName(name) != null)
|| (_profileTypePropertyManager.GetPropertyByName(name) != null)
|| (_profileSubtypePropertyManager.GetPropertyByName(name) != null))
{
throw new Exception(String.Format("WARNING! Property with the same name ‘{0}’ exists.", name));
}
CoreProperty coreProperty = _corePropertyManager.GetSectionByName(name);
bool exist = (coreProperty != null);
if (!exist)
{
coreProperty = _corePropertyManager.Create(true);
coreProperty.Name = name;
}
coreProperty.DisplayName = displayName;
if (exist)
{
coreProperty.Commit();
}
else
{
_corePropertyManager.Add(coreProperty);
}
var profileTypeProperty = _profileTypePropertyManager.GetSectionByName(name);
if (profileTypeProperty == null)
{
profileTypeProperty = _profileTypePropertyManager.Create(coreProperty);
_profileTypePropertyManager.Add(profileTypeProperty);
}
var profileSubTypeProperty = _profileSubtypePropertyManager.GetSectionByName(coreProperty.Name);
if (profileSubTypeProperty == null)
{
// we should get the display order before creating our new section
// otherwise its display order will be returned when trying to get
// the display order of the last section
int lastSectionDisplayOrder = GetDisplayOrderForLastSection();
profileSubTypeProperty = _profileSubtypePropertyManager.Create(profileTypeProperty);
_profileSubtypePropertyManager.Add(profileSubTypeProperty);
// set the position for new section by adding 100 to the last section
_profileSubtypePropertyManager.SetDisplayOrderBySectionName(name, lastSectionDisplayOrder + 100);
_profileSubtypePropertyManager.CommitDisplayOrder();
}
return profileSubTypeProperty;
}
#endregion
#region Privacy Overrides
public void EnableUserOverridePrivacy(string propertyName)
{
var property = _profileSubtypePropertyManager.GetPropertyByName(propertyName);
if (property == null) return;
property.UserOverridePrivacy = true;
property.Commit();
}
#endregion
#region Create or Update Properties
private ProfileTypeProperty CreateOrUpdateProfileTypeProperty(CoreProperty coreProperty, bool isVisibleOnEditor, bool isVisibleOnViewer)
{
var profileTypeProperty = _profileTypePropertyManager.GetPropertyByName(coreProperty.Name);
if (profileTypeProperty == null)
{
profileTypeProperty = _profileTypePropertyManager.Create(coreProperty);
_profileTypePropertyManager.Add(profileTypeProperty);
}
profileTypeProperty.IsVisibleOnViewer = isVisibleOnViewer;
profileTypeProperty.IsVisibleOnEditor = isVisibleOnEditor;
profileTypeProperty.Commit();
return profileTypeProperty;
}
private ProfileSubtypeProperty CreateOrUpdateSubtypeProperty(CoreProperty coreProperty,
bool required, Privacy privacy, bool userOverridePrivacy, bool isVisibleOnEditor, bool isVisibleOnViewer,
bool isUserEditable, ProfileSubtypeProperty section)
{
var profileTypeProperty = CreateOrUpdateProfileTypeProperty(coreProperty, isVisibleOnEditor, isVisibleOnViewer);
var profileSubTypeProperty = _profileSubtypePropertyManager.GetPropertyByName(coreProperty.Name);
if (profileSubTypeProperty == null)
{
profileSubTypeProperty = _profileSubtypePropertyManager.Create(profileTypeProperty);
_profileSubtypePropertyManager.Add(profileSubTypeProperty);
// set the section if specified and differs from the current one
if ((section != null) && (section.Name != GetSectionForProperty(profileSubTypeProperty).Name))
{
int displayOrder = GetLastDisplayOrderForSection(section);
_profileSubtypePropertyManager.SetDisplayOrderByPropertyName(coreProperty.Name, displayOrder + 1);
_profileSubtypePropertyManager.CommitDisplayOrder();
}
}
profileSubTypeProperty.IsUserEditable = isUserEditable;
profileSubTypeProperty.DefaultPrivacy = privacy;
profileSubTypeProperty.UserOverridePrivacy = userOverridePrivacy;
profileSubTypeProperty.PrivacyPolicy = (required ? PrivacyPolicy.Mandatory : PrivacyPolicy.OptIn);
profileSubTypeProperty.Commit();
return profileSubTypeProperty;
}
internal ProfileSubtypeProperty CreateOrUpdateDateProperty(string name, string displayName, string description, bool required,
Privacy privacy, bool userOverridePrivacy, bool isVisibleOnViewer, bool isVisibleOnEditor, bool isUserEditable, ProfileSubtypeProperty section)
{
return CreateOrUpdateProperty(name, "date", displayName, description, required, privacy, userOverridePrivacy, isVisibleOnViewer,
isVisibleOnEditor, isUserEditable, section, null, null);
}
internal ProfileSubtypeProperty CreateOrUpdateIntProperty(string name, string displayName, string description, bool required,
Privacy privacy, bool userOverridePrivacy, bool isVisibleOnViewer, bool isVisibleOnEditor, bool isUserEditable, ProfileSubtypeProperty section)
{
return CreateOrUpdateProperty(name, "integer", displayName, description, required, privacy, userOverridePrivacy, isVisibleOnViewer,
isVisibleOnEditor, isUserEditable, section, null, null);
}
internal ProfileSubtypeProperty CreateOrUpdateBooleanProperty(string name, string displayName, string description, bool required,
Privacy privacy, bool userOverridePrivacy, bool isVisibleOnViewer, bool isVisibleOnEditor, bool isUserEditable, ProfileSubtypeProperty section)
{
return CreateOrUpdateProperty(name, "boolean", displayName, description, required, privacy, userOverridePrivacy, isVisibleOnViewer,
isVisibleOnEditor, isUserEditable, section, null, null);
}
internal ProfileSubtypeProperty CreateOrUpdateStringProperty(string name, string displayName,
string description, int length, bool isMultiValued, string separator, string termStoreName,
string groupName, string termSetName, bool required, Privacy privacy, bool userOverridePrivacy, bool isVisibleOnViewer,
bool isVisibleOnEditor, bool isUserEditable, ProfileSubtypeProperty section)
{
TermSet termSet = null;
if ((!String.IsNullOrEmpty(termStoreName)) && (!String.IsNullOrEmpty(groupName)) && (!String.IsNullOrEmpty(termSetName)))
{
var session = new TaxonomySession(_site);
var termStore = session.TermStores[termStoreName];
var group = termStore.Groups[groupName];
termSet = group.TermSets[termSetName];
}
Action<CoreProperty> customSettingsOnCreate = coreProperty =>
{
// for multivalue and taxonomic properties the length
// will be set to 3600 chars by default
if ((!isMultiValued) && (termSet == null))
{
coreProperty.Length = length;
}
coreProperty.IsMultivalued = isMultiValued;
if ((isMultiValued) && (!String.IsNullOrEmpty(separator)))
{
coreProperty.Separator = (MultiValueSeparator)Enum.Parse(typeof(MultiValueSeparator), separator);
}
if (termSet != null)
{
coreProperty.TermSet = termSet;
}
};
Action<CoreProperty> customSettingsOnUpdate = coreProperty =>
{
if (termSet != null)
{
coreProperty.TermSet = termSet;
}
};
return CreateOrUpdateProperty(name, String.Format("string ({0} Value)", isMultiValued ? "Multi" : "Single"),
displayName, description, required, privacy, userOverridePrivacy, isVisibleOnViewer, isVisibleOnEditor, isUserEditable,
section, customSettingsOnCreate, customSettingsOnUpdate);
}
private CoreProperty CreateOrUpdateCoreProperty(string name, string propertyType, string displayName, string description,
Action<CoreProperty> customSettingsOnCreate, Action<CoreProperty> customSettingsOnUpdate)
{
if ((_corePropertyManager.GetSectionByName(name) != null)
|| (_profileTypePropertyManager.GetSectionByName(name) != null)
|| (_profileSubtypePropertyManager.GetSectionByName(name) != null))
{
throw new Exception(String.Format("WARNING! Section with the same name ‘{0}’ exists.", name));
}
var coreProperty = _corePropertyManager.GetPropertyByName(name);
bool exist = (coreProperty != null);
if (!exist)
{
coreProperty = _corePropertyManager.Create(false);
coreProperty.Name = name;
coreProperty.Type = propertyType;
}
if (coreProperty.Type.ToLower() == propertyType.ToLower())
{
coreProperty.DisplayName = displayName;
coreProperty.Description = description;
if (exist)
{
// call custom settings method if specified
if (customSettingsOnUpdate != null)
{
customSettingsOnUpdate.Invoke(coreProperty);
}
coreProperty.Commit();
}
else
{
// call custom settings method if specified
if (customSettingsOnCreate != null)
{
customSettingsOnCreate.Invoke(coreProperty);
}
_corePropertyManager.Add(coreProperty);
}
}
else
{
throw new Exception(String.Format("The CoreProperty with the specified name ‘{0}’ exists, but is a type of ‘{1}’ not ‘{2}’ ",
name, coreProperty.Type, propertyType));
}
return coreProperty;
}
private ProfileSubtypeProperty CreateOrUpdateProperty(string name, string propertyType, string displayName, string description,
bool required, Privacy privacy, bool userOverridePrivacy, bool isVisibleOnViewer, bool isVisibleOnEditor, bool isUserEditable,
ProfileSubtypeProperty section, Action<CoreProperty> customSettingsOnCreate, Action<CoreProperty> customSettingsOnUpdate)
{
var coreProperty = CreateOrUpdateCoreProperty(name, propertyType, displayName,
description, customSettingsOnCreate, customSettingsOnUpdate);
var profileSubTypeProperty = CreateOrUpdateSubtypeProperty(coreProperty, required,
privacy, userOverridePrivacy, isVisibleOnEditor, isVisibleOnViewer, isUserEditable, section);
return profileSubTypeProperty;
}
#endregion
}


